Hello, everyone!
This time I bring a tutorial on how to make Finite State Machines in Unity using C#. Though it could be done without Unity, I will use examples in Unity. Also, this concept can be taken to any language if you extract the general idea of it.
General Idea and when you can use it
The general idea of the Finite State Machine is to have a different set of states that you can change between them. The clearest example is a character that can switch from the idle state to attack, receive damage, dead, spawn, jump, etc. Some small rules are, for example, that you can’t have by default two states at once. Of course, you can make exceptions if your game needs it but it is not the most common way to do it. Another one could be that you will have one state machine per instance to be able to switch between these states.
Even characters are probably the most straightforward example, this can also be used for other stuff like changing through screens, animation controllers (like animators), loading strategies, etc. Also, State Machines are some sort of Strategy pattern in the end, so if you are familiarized with it you will find it is pretty similar.
Making the Finite State Machine
There are many ways to do it, but this is my favorite way of doing it. But, instead of just sending you the code, let’s look part by part. First, we will be looking for the FiniteStateMachine class that will be calling some stuff from the State class, take into account that we will fill those ones after finishing this one. You can keep the methods empty until we get there. Also, if you are looking at the code in GitHub, take into account that I will simplify a bit the Finite State Machine since that one has some extra stuff that aren’t a must to add.
public class FiniteStateMachine<T>
{
}
The first thing is that each FiniteStateMachine will have an owner type. Because of that, we are going to use generics to specify the type of owner, and that way we will be able to manage it easily.
Inside the class, let’s look into the fields and the constructor for it:
private T _owner;
private Dictionary<System.Type, State<T>> _states;
private State<T> _currentState;

public FiniteStateMachine(T owner)
{
        _owner = owner;
        _states = new Dictionary<System.Type, State<T>>();
}
We will have the owner that is going to be modified for the state machine. Apart from that, we will be containing all the states in a dictionary and the current state.
Now we will have a way to add states:
public void AddState(State<T> state)
{
        state.SetState(this, _owner);
        _states[state.GetType()] = state;
}
This way, we can add new states to the Finite State Machine as soon as we start. But now let’s look at how to set a state after having them added:
public void SetState<TS>() where TS : State<T>
{
        if (_currentState != null)
            _currentState.Exit();
        if (_states.ContainsKey(typeof(TS)))
        {
            _currentState = _states[typeof(TS)];
            _currentState.Enter();
        }
}
This one is a bit more tricky. The main change is that we won’t be using a string name or something like that for the states, the best way to have it is to use the types so it becomes very natural to use. The use will feel pretty similar to GetComponent method, FindObjectOfType, and others like that.
For last, we will be adding an Update:
public void Update()
{
        if(_currentState!=null)
            _currentState.Update();
}
This way, we will be calling the Update method for the current state from a MonoBehaviour in this case.
This is a really nice start for a Finite State Machine but more stuff can be added. For example, a method for the LateUpdate or a method to get the states in case we need to check something. Also, another thing that can be done, is that when a state is added, in case there wasn’t a current state before, it will be set as the default, and maybe that way you can also ignore the null check in the Update.
The State script
For the State script, we will want something that we can have as a base class to inherit from and then code a different one for each state. Because of that, we will start by having an abstract class:
public abstract class State<T>
{
        protected T _owner;
        protected FiniteStateMachine<T> _stateMachine;


        public virtual State<T> SetState(FiniteStateMachine<T> sm, T owner)
        {
            _stateMachine = sm;
            _owner = owner;
            return this;
        }
}
From here we can also see that we will be adding a reference to the state machine and the owner. The idea is that these two fields are protected so each concrete class can access them.
Lastly, we will add a bunch of methods that can be overwritten by the concrete classes.
public abstract void Enter();
public abstract void Update();
public abstract void Exit();
The idea is that we fill the content of the methods with what we want to do to each state. This will be more clear once we apply an example to it!
Use example
To do an example, I will be using parts of the code that I had been doing for one of my games.
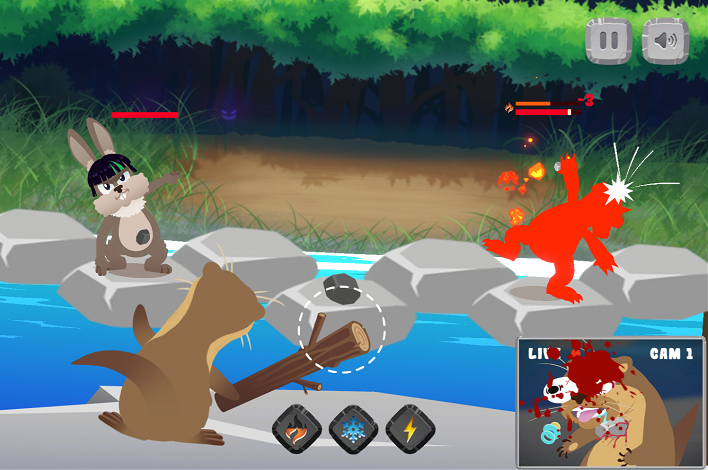
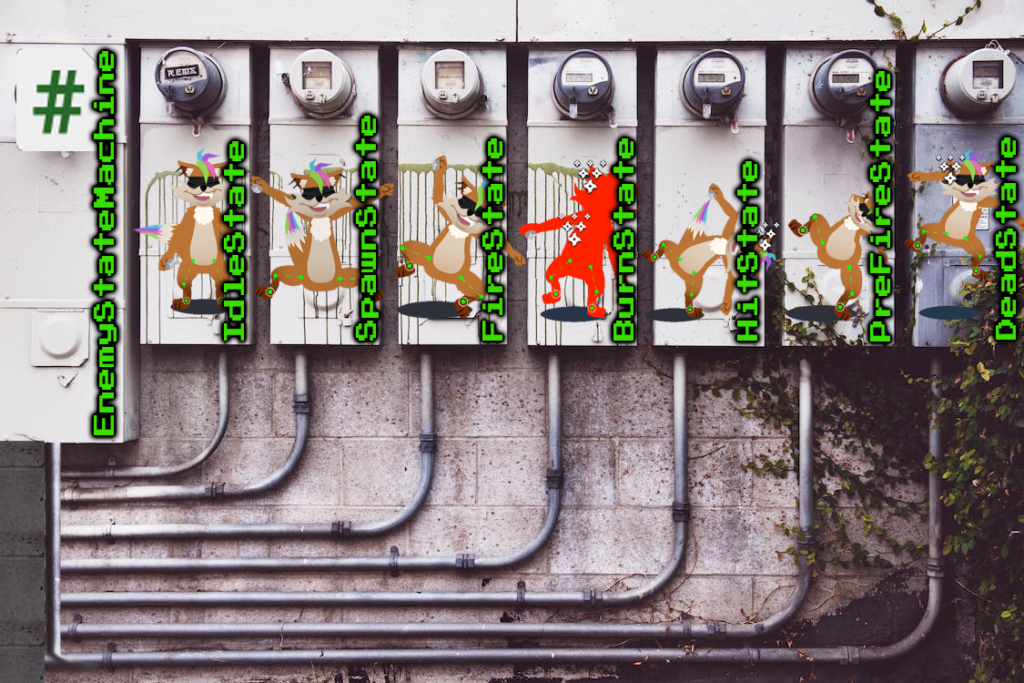
Here the main character and the enemies are using state machines in order to work. Each one of them has an instance of them inside the character class. Let’s take a look at the stuff that we have for the enemy.
_stateMachine = new FiniteStateMachine<BasicEnemy>(this);
_stateMachine.AddState(new EnemyIdleState(fireEveryXSeconds, animator));
_stateMachine.AddState(new EnemyChargingState(fireAnimationDuration, animator));
_stateMachine.AddState(new EnemyFiringState(projectileTarget, animator, projectileSpawnPosition, throwProjectileSound, getAnimationCurveDirection, projectilePoolName));
_stateMachine.AddState(new EnemyDeadState(animator, deadSound));
_stateMachine.AddState(new EnemyHitState(animator, damageTakenSound));
_stateMachine.AddState(new EnemyStunState(animator));
_stateMachine.AddState(new EnemyIceState(animator));
_stateMachine.SetState<EnemyIdleState>();
This is a part of the code that we have in the init class of the Basic Enemy class. As you can see, we are creating the Finite State Machine and setting a bunch of enemies. In the end, we are setting the idle state as default. This is a simple way of initializing the Finite State Machine we were working on.
Then one important thing we have is that we are calling the Update from the Finite State Machine in the Update of the MonoBehaviour.
_stateMachine.Update();With that, we should be able to have the Finite State Machine working on the Basic Enemy class. But what about the States? Let’s take a look at the idle state for example:
public class EnemyIdleState : State<BasicEnemy>
{
}
First of all, the class inherits from the State and clarifies that is for a Basic Enemy in the generic type. This will make that the owner and the Finite State Machine types are correctly set. In the constructor, we can request the parameters we need. To keep it simple, I will only focus on the other methods. Let’s take a look for example the Enter method content:
public override void Enter()
{
        _currentTimer = 0;
        _animator.SetTrigger(IdleTrigger);
}
Here we can see that we are resetting a timer and setting the animator to trigger the Idle state. It is pretty useful to use the Enter and Exit methods to trigger animations.
public override void Update()
{
    _currentTimer += Time.deltaTime;
    if (_currentTimer >= _fireEveryXSeconds)
        _stateMachine.SetState<EnemyChargingState>();
}
Meanwhile, in the Update, we are having a timer advancing and if the time passes, then we set the state to the EnemyChargingState. This way, we can switch between states as needed because each State contains a reference to the Finite State Machine.
Small tip, try to avoid having stuff like UniRx in the states or you will need to take care of it if something external to the state wants to switch the state. Otherwise, you will execute stuff from a previous state because you didn’t dispose of it correctly.
This is just a quick example of its use but it covers creating it and a state with the Enter and Update states. Of course, you can make it a lot more complex depending on your needs.
Wrap up
So basically, you can apply a Finite State Machine to anything you want to make it have different states and switch between them. They are pretty useful because you can basically separate the logic of each state into different classes instead of having all in the main one. One good sign that you may need a Finite State Machine is that you basically have a switch with all the states and have logic in each case.
Anyway, hope you find this useful. You can look a bit more into a more complex Finite State Machine on GitHub if you want but this is already a really good start.
If you have any questions, feel free to leave them in the comments section and stay tuned for more programming posts or news about the stuff I am working on!