Hello, everyone!
This time I am bringing you a set of 6 useful Unity Editor tricks that you probably didn’t know about unless you paid a lot of attention to the whole Unity editor or someone told you about them.
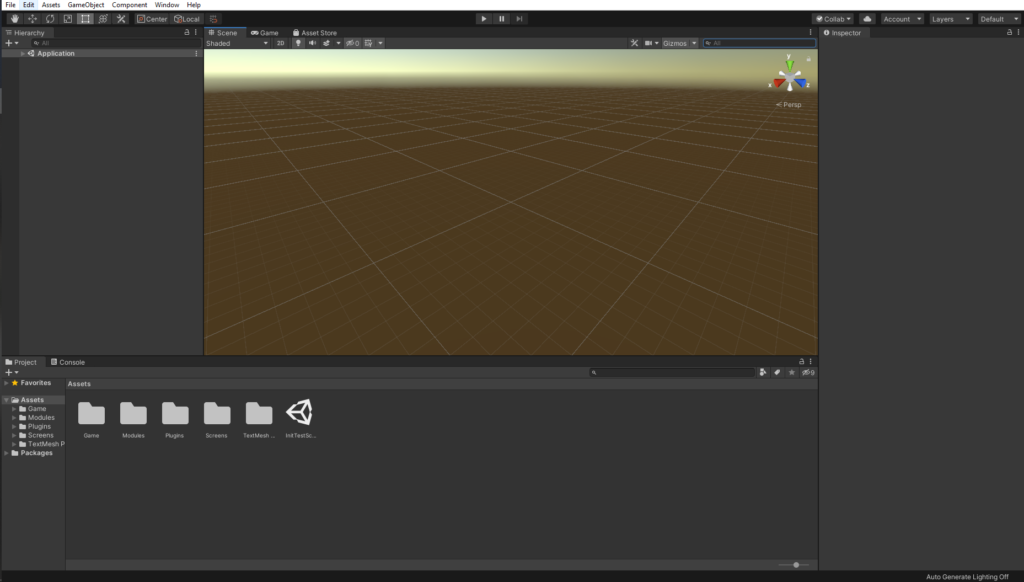
The incredible thing about these tricks is that no matter how long you had been working with Unity, there is always the possibility of you not knowing about them. I had, more than once, seen someone do something incredible with the editor that I didn’t know about and it was there, in front of my eyes, all this time. So let’s get started and I hope you find them useful!
Lock your selection in the inspector tab
One of my wow moments, when I was studying videogame programming in a career, was when someone showed me how to lock my selection in the inspector tab. At the time, I was working on Witchcraft and we had a bunch of drag-and-drop game objects to list fields that needed to be placed also in order. This was a lot of time and was very frustrating if you accidentally misclick and lost the reference to the game object you were dragging stuff into.
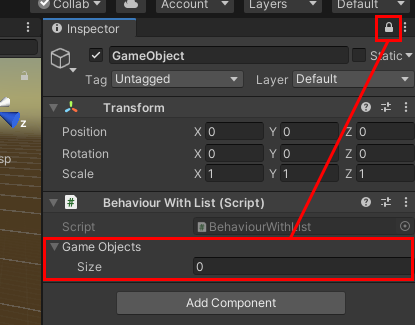
When someone showed us the possibility of actually locking the inspector view this saved us a lot of time. We were now able to lock our selection, go to the game objects, select all of them and just drag them into the list we wanted. This one is a time saver so if you didn’t know about it, please try it out and start using it since it will help you a lot.
Use Debug mode in the inspector tab
Maybe you had been struggling sometimes with being able to see private field values during runtime in real time and you had been filling a bunch of debug logs or using the debugger from your IDE. Or maybe, you just wanted to know what was the current private value of a class you can’t modify for whatever the reason is. For that, you can set up the inspector tab to use its debug mode!
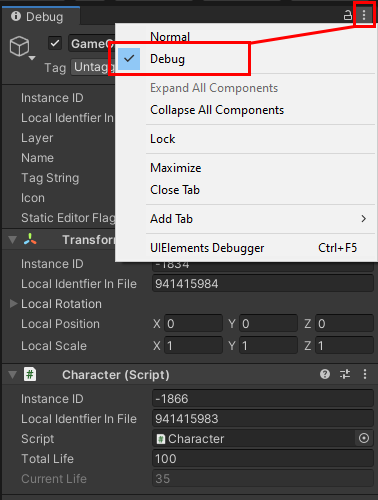
As you can see, after enabling the Debug mode in the inspector tab, you will be able to see the private vars of your classes so you don’t need to use other methods anymore in case you need to see how those values are updated in realtime.
Open multiple tabs of the same category
One thing I didn’t believe was that having two screen monitors at the same time was a lot more useful than having only one. I think the same goes for having multiple tabs of the same category at the same time. You just don’t find it useful until you start using it. Though, to be honest, this one is a bit more casually useful than two screen monitors.
In order to do so, first, you will need to add a second tab of whatever you want to have two.
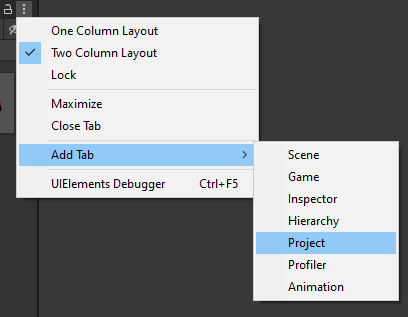
And then you can lock one of those two once you find what you wanted to keep and use the other one to keep navigating.

In this case, I am doing this with the Project tab since I had found it useful in the past when re-organizing projects. Remember that having your project folder structure tidy is as important as having your code tidy!
Setting up layouts
You probably know that you can re-arrange the setup of your Unity editor by dragging the panels to the sides. That is a nice thing but sometimes you just want to go back to where you were. For that, you can always click on Layouts->Default.
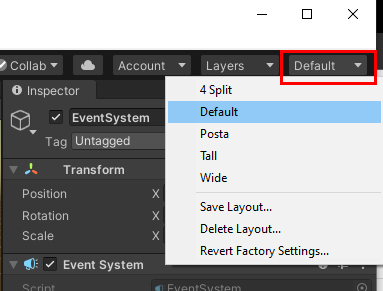
But wait! There is more. Not only that, you can re-arrange your layout to any configuration you want and use the Save Layout option to name it and keep it with your other layout settings. I found this particularly useful because the Test Runner tab doesn’t come by default and I like to have the Animator and Animation tabs handy all the time.
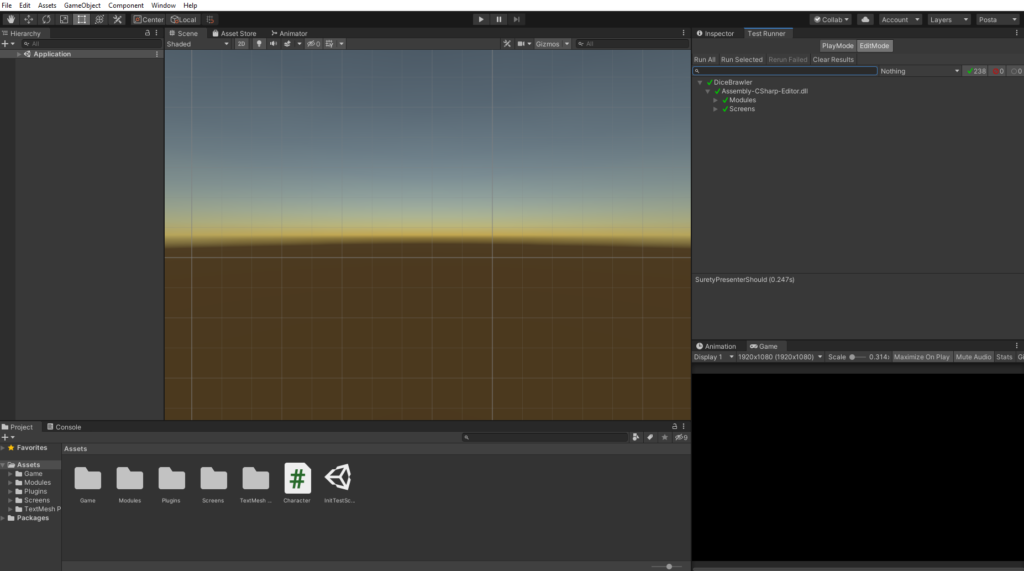
This is my standard layout though, knowing that I can quickly go back to it, I feel a lot more comfortable arranging it all the time to the most useful setup depending on what I am currently doing.
Set up different aspect ratios for the Game tab
One normal mistake when developing games for the first time is to not take care of different aspect ratios. This depends a lot also on the platform you are developing at. For desktop games, you may want to cover a wide range of landscape positions if your game is full screen but maybe only one resolution if your game runs only in windowed mode for whatever the reason is. This becomes more difficult when you work on mobile games and have to take care of a broader variety of resolutions but easier when you work for a browser game and use a unique resolution.
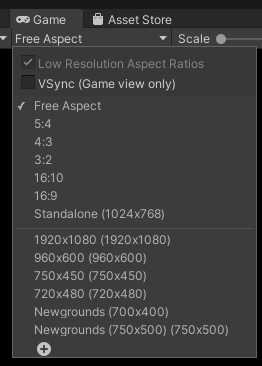
So basically you can go to the Game tab and select the aspect you want. Even more, you can add more of them. For example, for my Newgrounds games, I usually use one of those resolutions since I feel it is very standard to translate from a desktop game to a browser game. Meanwhile, on my work computer, I used to have a bunch of mobile resolutions until we started using the Device Simulator package.
Filter your project search
Another time-saving thing is to know how to filter your searches in Unity’s Project tab. There a few things you can do here that are usually overlooked.
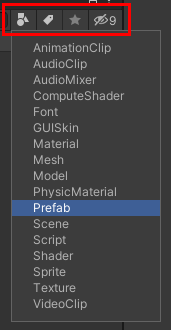
- Search for specific types (you can even type it by using t:NameOfTheType).
- Use the label system that Unity provides.
- Save a search to have it handier for the next time (this one will appear over your folder structure).
- Toggle invisible packages to be or not visible.
Knowing that these exist will help you to re-organize your folder structure and find things faster than before.
Wrap up
I hope you found some tricks you didn’t know about and that these new tricks help you maximize your production speed in video games. The fun part of making video games is being able to iterate fast, not searching for stuff or dealing with difficult tasks in the editor.
These were just a few of the “tricks” that you may or not know, of course, there are other things you can do with the default editor so I encourage you to know to go and look for every button you can find in each tab and try to figure out what it does! Maybe you find something new for you that will help you from now on.
Thanks for reading and stay tuned for more content!